Wednesday, February 27, 2013

Goat Cheese, Caramelized Onion, & Pancetta Pizza

My husband's favorite food is pizza (well, according to him anyways - I just so happen to believe that his favorite food is hot dogs). Since this is his 'favorite' food, I'm constantly trying to come up with new pizza ideas so we can have pizza often and not get sick of it.  Also, it  just so happens that one of my favorite things to buy from Fresh & Easy is their ready-to-use pizza dough.  They have regular, whole wheat, and garlic & herb all packed and ready to go in the refrigerator section (next to the cheeses in my store).  In my opinion, this is one of THE BEST products they sell. Last night we took F&E whole wheat dough and concocted a delicious goat cheese, caramelized onion, and pancetta pizza.


Here's the ingredient line up: whole wheat pizza dough, mozzarella cheese, diced pancetta, goat cheese, yellow onion, thyme (fresh from my 'garden' - woot woot!).
Also used minced garlic, olive oil, cayenne pepper but they didn't make it in to the picture.  


The first and most important step is to let your dough sit out for 20 minutes until it is at room temperature.  It is almost impossible to work otherwise. So, while that is happening, prepare your other ingredients.

Fry up that pancetta! It's basically like diced up bacon - if you have bacon, you could easily use that as a substitute.  

You want to cook that until it is nice and golden.  Remove from pan with a slotted spoon and transfer to paper towels to drain.


DON'T TOUCH THAT PAN WITH ALL THAT PANCETTA GREASE! WE'RE GONNA USE IT.... to caramelize the onion that you have sliced into thin rings, of course!


These bad boys might take a bit (20 mins or so...) to get nice and golden. You will want to stir them occasionally but in the in between time - go work your dough.  

You can use a pizza stone or a pizza pan - I chose a pan because I forgot to preheat my stone with the oven -  oops! Anyway, work your dough. Remember to stir those onions every once in a while...


I drizzled olive oil on my crust and then sprinkled with minced garlic and cayenne pepper to give it a little heat.


Once your onions are done and cooled (I'm so sorry I didn't get a picture of mine), arrange them on your dough. Cover with mozzarella cheese. 


Add pancetta and top with goat cheese.  Bake at 450 degrees for 12-15 minutes. Sprinkle with chopped thyme leaves before serving. 

Goat Cheese, Caramelized Onion, & Pancetta Pizza
Ingredients

  • 1 pkg. pre-made pizza dough or make your own from scratch
  • 1 5 oz. package pancetta
  • 1 yellow onion, sliced into thin rings
  • 1 tsp cayenne
  • 2 tbsp olive oil
  • 1-2 cloves garlic, minced
  • 1/2 cup mozzarella cheese
  • 1/3 cup crumbled goat cheese
  • couple sprigs fresh thyme leaves, chopped

Directions

  1. Preheat oven to 450
  2. Let dough sit at room temperature about 20 minutes
  3. Cook pancetta in a pan over medium heat.  Cook until golden and crispy. Remove with a slotted spoon to a paper towel to drain. 
  4. Place onions in pan with pancetta drippings to caramelize onions over medium heat.  Stir onions occasionally until a golden color is achieved. Remove and cool.
  5. Work dough into pizza pan and sprinkle with cayenne pepper
  6. Drizzle olive oil and garlic evenly onto dough.
  7. Top with caramelized onions, pancetta, mozzarella cheese, and goat cheese.
  8. Cook for 12-15 minutes until edges of crust are golden brown.
  9. Remove from oven and sprinkle with thyme leaves. Serve & enjoy.


Tuesday, February 26, 2013

Creamy Tomato Soup (only 4 ingredients!!)

I just recently (I'm talking within the past year or so) became privy to the magic that is tomato soup with a grilled cheese.  I know, that is complete insanity, so let me explain... Ya see, when I was a kid I would turn up my nose at pretty much anything that had tomatoes in it and unfortunately, this included tomato soup (sad face!!).  I ate grilled cheese regularly - bread, butter, and cheese I could handle like a champ.

I missed out on years and years of the magical comfort food pairing. When I finally decided to give the combo a try, you can imagine my excitement! The two just belong together! Needless to say, I now crave this combo constantly. My stomach is probably trying to make up for years of neglect.
Yesterday, one of these cravings came over me and I had to have some cheesy goodness, on crunchy golden bread, dipped in warm, creamy tomato deliciousness, STAT. Luckily, While I was on my lunch break I was able to whip up a batch of this soup with a grilled cheese in 15 minutes to satisfy my craving.  


Here are the ingredients - 
Soup: butter, flour, 2% milk, 14.5 oz can diced tomatoes with garlic & olive oil (do not drain) 
Grilled Cheese: butter, french bread, sharp cheddar
 I started by melting butter.

 Add the flour and wisk it all together.

 Add milk and wisk until there are no clumps and mixture begins to thicken.

 Add can of tomatoes and mix well.


Transfer to a blender or food processor and pulse until well blended.

Make grilled cheese and serve together! YUMMMMMMM.

Creamy Tomato Soup

Ingredients

  • 2   tbsp butter
  • 2   tbsp flour
  • 1 ½ cups 2% milk
  • 1   14.5 oz can diced tomatoes with garlic & olive oil

Directions
1. Melt butter over medium heat.
2. Add flour and mix well until blended and paste is formed.
3. Slowly, wisk in milk. Continue to wisk until the sauce thickens and there are no flour clumps.
4. Add can of tomatoes and stir well.
5. Transfer to blender or food processor and pulse until well blended. Serve immediately.

TIP: Any blend of canned tomatoes would work for this soup - I’ve seen some with basil and oregano that would also work perfectly.


Monday, February 25, 2013

Weekend Chores and What's for Dinner This Week?

Happy Monday! Hope you had a wonderful weekend.  Mine was FULL of house work and chores - not a fun way to spend a weekend.  The most exciting thing I did this weekend was plant a garden (kind of...).

Let me tell you the story of my adorable little garden. When Cody (aka the hubby) and I get bored, we go to Home Goods to wander.  This can sometimes be a rather dangerous excursion as Home Goods has ridiculously cute household items.  For instance, this little herb home ($19.99):

We have been wanting to plant a garden; however, we have mischievous dogs that will somehow make their way into any place they are not supposed to be. When we stumbled upon this little wooden decoration, we knew we had to give it a try!  We stopped by our local nursery and picked out a few herbs to test out: cilantro, basil, rosemary, parsley, and thyme.  I cannot wait to test these babies out this week! 

That being said, here is this week's dinner menu: 

Cobb Style Burgers for two w/Rosemary Roasted Red Potatoes
Spicy Pasta w/a side salad tossed with homemade Garlic-Parmesan & Peppercorn dressing
Goat Cheese, Pancetta, Caramelized Onion Pizza
Taco Salad with Southwest Chicken Chili

Only 4 recipes for this week because the hubby is leaving town on Friday for a bachelor party so my night will probably consist of leftovers and meeting with my girlfriends for a couple drinks. Geez.... is it Friday yet??


Friday, February 22, 2013

Creamy Asiago Orzo

Ok, so I lied... I had told everyone to check back in today for a warm soup recipe but when I got home from work last night I was HUNGRY and soup just didn't seem like it would fit the bill. So, I decided to make Italian Parmesan Crusted Chicken with Asiago & Lemon Orzo by Sarcastic Cooking.  I'll post about the chicken later because I do not want to take away from the star of this show - the orzo. It is creamy and scrumptious and I recommend you make this instant! This orzo recipe reminds me of a favorite risotto recipe except foolproof and without constant stirring. It's really a win win.


So, here are the main players in the orzo: 

Flour, Italian seasoned bread crumbs, orzo, asiago cheese, lemon, onion, butter, 2% milk, salt, pepper, and red pepper flakes (you caught me, not ALL items in my pantry are F&E but MOST are) **Note: I cut the original recipe in half and omitted the dill because I am not a huge fan **

First, boil a pot of water and cook orzo as directed on package.
While your waiting on the orzo, melt your butter and add your chopped onion. Saute until translucent. Add garlic and saute about a minute more. 

Add flour and wisk until well combined then add milk and wisk until well combined and lump-free.

ADD CHEESE! (I accidentally added too much cheese but then just added a little extra milk to smooth it out.) The consistency should be smooth and creamy, not sticky. 

Add the salt, pepper, red pepper flakes, lemon zest & juice.
About the time you finish your sauce, the orzo should also be done - drain it and add it to the cream mixture.
Mix the sauce and orzo together until evenly coated. Transfer to a baking dish. Combine melted butter and Italian seasoned bread crumbs - sprinkle over the top of the dish.  Top with extra asiago cheese. Bake for 15-20 minutes. Then serve and enjoy! The hubby and I both loved this dish and I will definitely be making it again.

I served it with a simple Italian Parmesan crusted chicken breast and it was delish.  I'll be sure to post that recipe later. 

Thanks for reading!


Wednesday, February 20, 2013

Chicken Salad Wrap

Happy Hump Day! This week seems to be flying by and I'm not complaining. Remember how just yesterday I was bragging about how wonderful the Vegas weather had been?  Well, in true Vegas fashion, that changed overnight and the high today will only be 57.  I know, I know - 57 is summer weather compared to what some of my friends back east have been experiencing but 57 for Vegas is soup weather. That being said, tonight I will be whipping up a bowl of Bacon, Cheddar, Broccoli soup. 

As for now, I wanted to share a quick and easy meal that can be made for a packed lunch.  But first a little story time:
For a resolution this year, I decided to try to eat out at more independent, local businesses rather than chains. You would think this would be easy but my office is right next door to a Wendy's and I cannot tell you how convenient it is to run next door and grab a salad. I'm glad I made this resolution because it made me stumble upon a local bakery, Chocolate & Spice, that has become one of my favorite go-tos. They have a number of delicious items on their menu but my favorite is the Chicken Salad Wrap. One thing I didn't consider while making my resolution was just how much more expensive it would be to eat at only independent, local businesses and at $7 a pop, these wraps were breaking my budget.  Which brings me to my copy cat recipe of the Chicken Salad Wrap I've come to love so much.

Here are my Fresh & Easy ingredients:
can of premium chunk chicken breast, mayonnaise, dried cranberries, pistachio kernels, apricot jam, red seedless grapes, flour tortillas

 Drain the can of chicken breast and put it in a large bowl.  Mash it up real good with a fork. Next add all the yummy: 1/4 cup pistachio kernels (you could use almonds, pecans, walnuts), 1/4 cup dried cranberries, 1/4 cup apricot jam (trust me!), 1/2 cup mayo (you can use less if you prefer lightly dressed chicken salad), and 1/2 cup chopped grapes. Season with salt and pepper.
 Mix it all up and then place a good amount of the mixture in the middle of a tortilla
 Fold into a wrap or roll up.
Cut in half and enjoy! The next time I make this recipe I want to add chopped celery, cumin, and a little red onion just for a little extra kick.
  • Give it a try and let me know what you think.

  • Chicken Salad Wrap

  • Ingredients
    • 1 12.5oz can of premium chunk chicken breast, drained
    • 3/4 cup mayonnaise or greek yogurt
    • 1/4 cup dried cranberries or dried cheries
    • 1/4 cup chopped pistachio kernels
    • 1/4 cup apricot jam
    • 1/2 cup chopped red seedless grapes
    • salt and pepper
    • 2 burrito size flour tortillas
  • Instructions

    1. Mix the first 6 ingredients together in a large bowl. Salt & pepper to taste. Place half the mixture in the center of a tortilla then roll up or wrap.
    2. <a href="http://zipth.is/@ztywns" title="Click to save this recipe. Powered by ZipList.">Chicken Salad Wrap</a>

Check back in tomorrow to find out how my soup turns out!

Tuesday, February 19, 2013

Sweet & Sour Kabobs

Happy Tuesday everyone! We've been enjoying some beautiful weather here in Las Vegas and it has made me want to dust off the BBQ and put it good use.  Enter, Sweet & Sour Kabobs.  (recipe courtesy of Once a Month Mom)


These little babies are so simple to make and are pretty tasty too.  A great thing about kabobs is you can use your imagination for the ingredients. I chose to stick to the recipe for my skewers but encourage you to add any of your favorite veggies to this dish as you really can't go wrong.  Here are my ingredients:
 Fresh & Easy beef & pork meatballs (found in the refrigerator section), pineapple chunks (found in the refrigerator section - though canned would work just as well), red & green bell pepper, & onion.

Chop up the onion, red & green bell pepper in to large chunks:
Then start to skewering all your ingredients on to large skewer sticks alternating between each ingredient. I used about 3 meatballs per skewer. Once you have made all your skewers, place them in a baking dish and drizzle with the sweet and sour sauce.  You want to make sure they get evenly coated so shake 'em and turn 'em around in the dish. You could also place them in a freezer bag with the sauce and shake - just be careful to not puncture the bag with the skewer.


Now, its time to grill! I placed them on our grill for about 10 minutes and flipped them around half way through. 
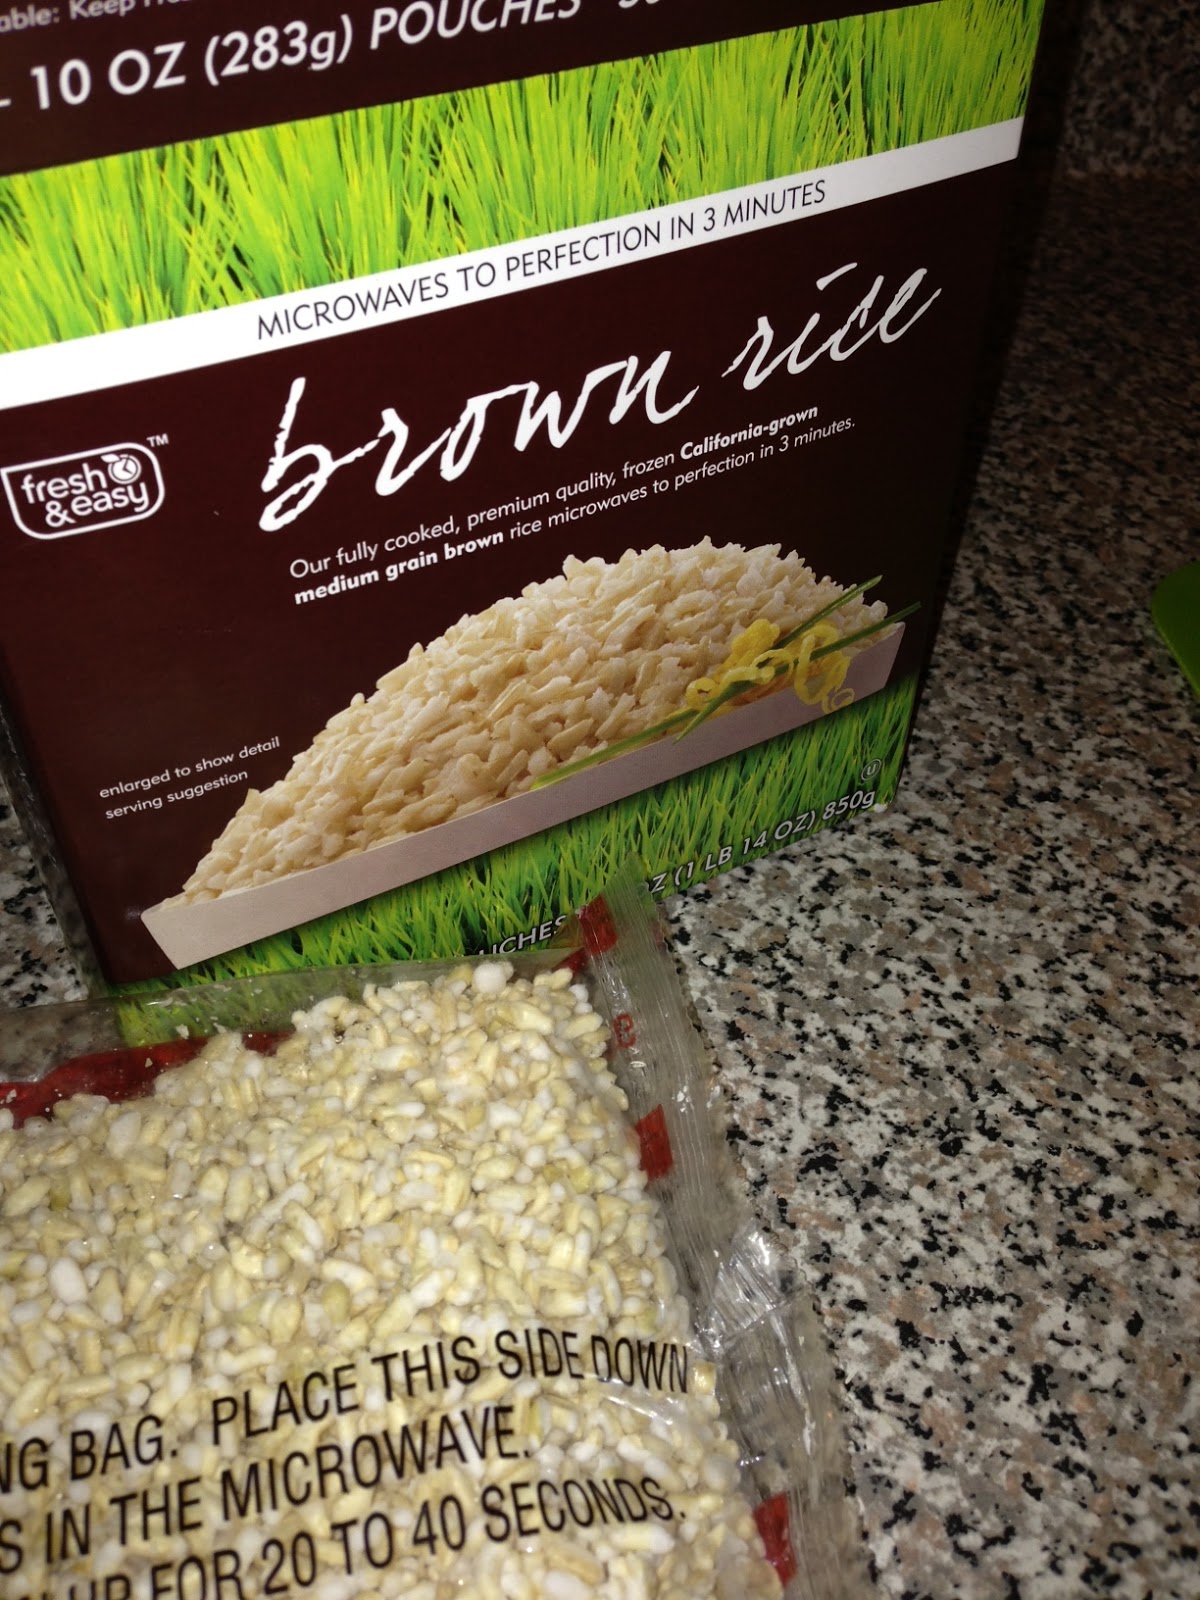
After I flipped them, I went back inside to throw my rice in the microwave.  I LOVE these F&E rice packs found in the freezer section. I use them all the time.  They are just so easy - pop in the microwave for 3 minutes and you have perfect rice. One bag is perfect for me and my husband to split.
When the skewers came off the BBQ they were charred in some places and the sweet and sour sauce was lightly caramelized.  They were perfection.  The hubby and I split one right off the grill, just to test them out. 

These skewers are yummy! Especially, when you get the bites that have a little bit of everything.  Hubby says we could have added some mushrooms so I'll keep that in mind for next time. 

Give 'em a try, let me know what you think...


Monday, February 18, 2013

Welcome to 30 - What's for Dinner This Week?

Hi there! My name is Shelly and I am the Small Market Cook. I reside in fabulous Las Vegas where I work with spreadsheets by day and make delicious meals (or at least try to) for my husband at night. I spend a decent amount of time in grocery stores and my favorite places to shop are the small markets. My favorite small market: Fresh & Easy.  I love the products, the location, the prices, the COUPONS... I mean, honestly, I cannot think of one thing I dislike about this store.

You can imagine my despair when I got the news that Fresh & Easy stores might be going out of business. I was sad about it.  Really sad about it.  I do the majority of my grocery shopping at this store and it's products have become permanent fixtures in my day to day cooking. I found myself trying to think of ways I could show my support of the friendly neighborhood market other than signing a petition on Change.org. Then it hit me, I should show how much I use their products by blogging about it. So here we are. Ready, set, write!

I celebrated my 30th birthday over the weekend (had a great time and drank way too much) and I was taken out for quite a few celebratory meals. Here I am at my "13 Going On 30" party with my birthday cake:
Anyway, I'm ready to get back to normal and make dinners for me and the hubby at home.
Here's the menu for this week:

That's all for now! Check back in tomorrow for a look at the F&E products that will make tonight's dish!